How to host your website using Google App
Engine
First we are going to learn how to create Google App Engine application using eclipse.
- To do that first you need to install Google plugin for eclipse.
- Then you have to create web application project in eclipse.
- Finally you have to deploy it .
 |
| figure - 01 |
You must logging to your Google account.If you are new to Google App Engine it will display.
 |
| figure - 02 |
Then click on Create Application button.Then below window will be loaded.

Application
Identifier must be between 6 and 30 characters. Lowercase letters, digits, and
hyphens are acceptable characters. Must start with a letter. Trailing hyphens
are prohibited.
You
can change your Application title anytime but you cannot change your
application identifier.
Then
open eclipse and select a work space for your project. Now you have to Google
to find Google eclipse plugin. In my case Google eclipse plugin Kepler.
 |
| figure - 05 |
 |
| figure - 06 |
https://dl.google.com/eclipse/plugin/4.3 copy this URL and follow the instruction on the above site to install
that plugin into your eclipse
We only need to install
 |
| figure - 07 |
After
you installing the software blue color Google icon will appear in the top menu.
| figure - 08 |
Click
on that icon and create Google web application project.
 |
| figure - 09 |
Then
it will leads to the bellow window.Project name and package name is up to you.
 |
| figure - 10 |
Then the project structure will looks like
 |
| figure - 11 |
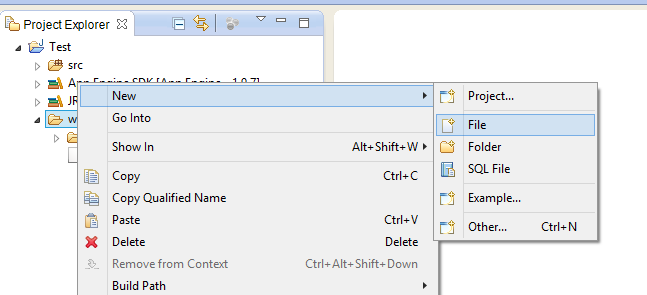
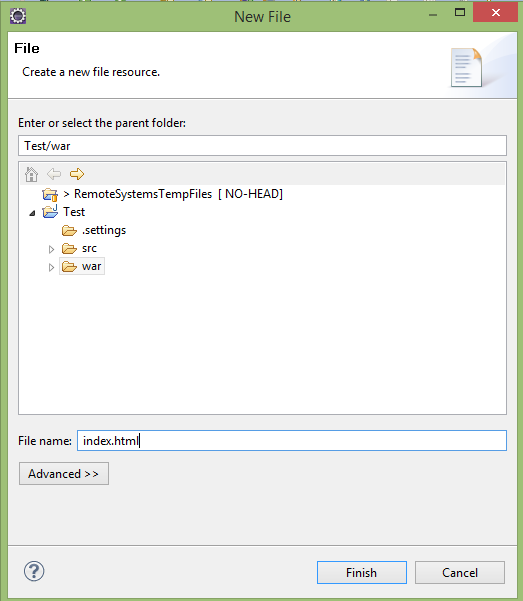
Just
delete the Test.html & Test.css .Then
create your own index.html file inside war folder.
 |
| figure - 12 |
 |
| figure - 13 |
Type
anything you need to display in your web page just like below.
 |
| figure - 14 |
Your
console tab will looks like below
 |
| figure - 15 |
Then
open your web browser and go to the link http://localhost:8888/
Now I am going to deploy my web application in App Engine.Before doing that first you need to stop your application.
 |
| figure - 16 |
 |
| figure - 17 |
Then
it will ask you to logging to your Google account.
 |
| figure - 17 |
 |
| figure - 18 |
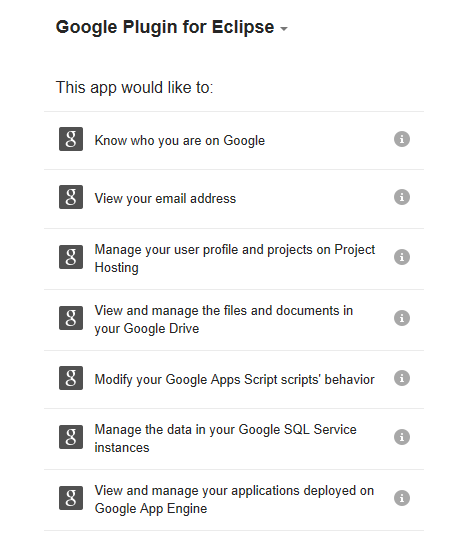
Then
click on accept button to continue.Then this window will appear.
 |
| figure - 19 |
Then
click on the link “App Engine Project settings”
 |
| figure - 20 |
Now you have to give the Application ID .Application ID is the one you created
in https://appengine.google.com/ the hello-webapp1
|

Then
it’s ready to deploy
 |
| figure - 22 |
 |
| figure - 23 |
Now
any one can access it by using this url http://1-dot-hello-webapp1.appspot.com/
 |
| figure - 24 |
I
would like to share some small things I have done using App Engine .Here are
the links
(If
you forget your app URL go to the Administration Application settings and You
will find your URL under Application Identifier Alias J)
No comments:
Post a Comment