How
to Create a Simple
phoneGap
Application using PhonGap Build
Before all the
things we need to create a “PhoneGap Build” account for free. To do that first
go to the https://build.phonegap.com/
website. Scroll down (Don’t forget to read the content of the site as it
contains many useful information for beginners like us) you will find a place
which says, “Choose your plan”.

Select your plan and continue. In my case I
will continue with free plan. It will bring you to a window like below.

Give your
email, password and sign in to the account. Then you will get the below window.

Click on the
blue color button “+new app”

Here you have
to select whether you are going to create an open-source application or a
private application. As you saw earlier, free account can only create 1 private
application. But it will allow you to create unlimited number of open-source
applications. Here for more convenience, I have select the open-source
application.
Before filling
this part you have to do lot more. Let’s see how we should create a simple application.
First I have created a simple web application (Using JQuery mobile).
index.html file

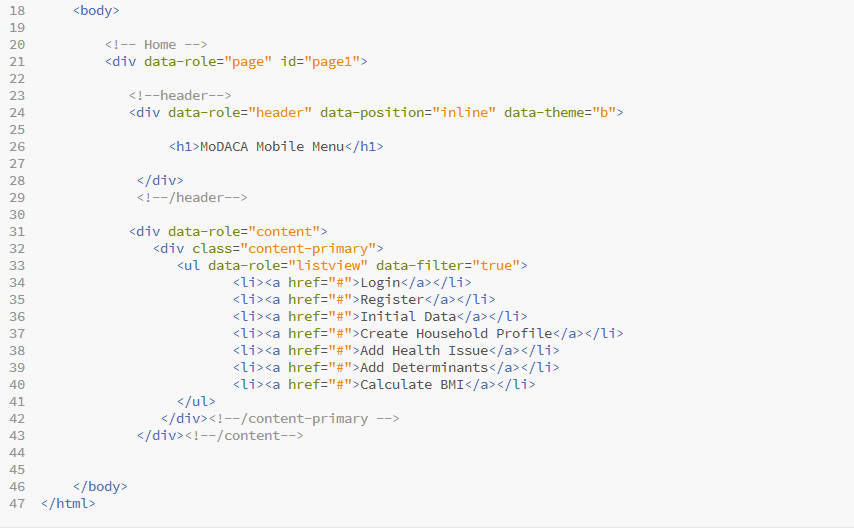
config.xml file
Don’t forget to add config.xml file to your “git”
repository, below you can see a simple config.xml file structure. You can
modify it according to your application. There is a commented line in 22, 23,
and 24. When you try to build “advanced applications” using PhoneGap build, you
may need to access camera, microphones and local storage etc. So there are
several plugins to help you, and the commented lines display where and how we
should add plugins to our application.

After you open the index.html in the browser right click on
your web page and go to “inspect element” then go to the emulation and select a
device and emulate your web page. When I did that my application look like
below.

Click
on “reset” and you can leave the emulator. Now the big thing! .If you are going
to create a privet app right click on your app folder (where you store your
index.html file css and js folders) and make a “Zip” file of it. “Beware” not
to create .rar. Then simply upload it into phoneGap build.
If
you prefer to build your app public then follow the instructions given below;
1. Create
a “git” repo
2. Add
files to the “git” repo
3. In
your “git” repo there is a place call HTTPs clone URL, just copy it to phoneGap
build .

4. Then
click “pull from git repo”
5. Then
you may need to refresh your page
6. Click
on “ready to build”.

Finally you
will get above output and you can install the application using QR code or
.apk(android) or .xap (windows).
If you wish to
continue the developing you can go to settings and enable hydration. Then your
application will update with respect to application changes. No need to install
the application again and again.


You can push any changes to your “git” repo
and you can update your application by clicking on “Pull latest”.

I have discussed the above things in brief.
So if you need any clarification please leave a comment.


